Your here: Home / Network / Hardware Specific / Asus / WL-550gE
 |
This article is a stub. Please help InfoDepot Wiki by expanding it, adding pictures, and improving existing text.
|
| File:Asus_WL-550gEa.jpg |
WARNING: It is recommended to use ASUS Firmware restoration tool for ASUS routers initial flash
(use *.TRX file)
NOTE: During configuration or flashing a device, the only that should be hooked to the device is the computer and power.
Specs[]
 This section is in need of cleanup!
Platform
Serial Num. =
FCC ID = MSQWL550GE
CPU Type = Broadcom BCM5352EK (BCM6352E SoC)
MIPS Rev = ?
CPU Speed = 200MHz
Bus = ?
Flash Type = Parallel
Flash Chip = MX 29LV320CBTC-90G
Flash Size = 4MB
Max Firmware Size = 3801088 bytes
RAM Size = 16MB
RAM Chip = 2x Samsung 513 K4S641632H-TC60
nvram Size = ?
Switch = Broadcom BCM5352EK (BCM6352E SoC)
Port-based vlan = ?
802.1q vlan = ?
Ethernet Port Count = 1-WAN 4-LAN
Wired Standard = IEEE 802.3?
boot_wait = on
bootloader = CFE
Flash Card Socket/Type = No
SD/MMC Mod Support = No
MiniPCI slots = No
PoE = No
Power = 5
Color of LEDs = ?
Size = ?
USB = 2 USB 1.1 (Requires soldering header)
Serial Port = Yes
JTAG Port = No
Supported by TJTAG 3.02 = No
Supported by dd-wrt as of = v23 SP2
dd-wrt K2.4 Support = Yes
dd-wrt K2.6 Support = No
Special Features = ?
Radio (wl0)
Wireless Radio = Broadcom BCM5352EK (BCM6352E SoC)
WLAN DSP processor = ?
Antenna Connector Type = RP-SMA
Wireless Standard = IEEE 802.11b/g
WiFi Operating Frequency = ?
 802.11g = 6, 9, 12, 18, 24, 36, 48, 54Mbps
 802.11b = 1, 2, 5.5, 11Mbps
Radio cor_rev = ?
Radio Capabilities = ?
Links of Interest[]
This section is in need of cleanup!
Flashing[]
It is extremely important to follow the guidelines for your specific modem. Please see Installation for more information. Remember to follow the peacock thread first for background [1], use this page to identify your modem model correctly, and use the dd-wrt download search page (DD-WRT Downloads page or secure version) to ensure that you are getting the correct file (or files, as often is required) for the job.
A major clean-up of the Asus Install section was needed (and done) in the fall of 2009 - see Asus WL500-- old descriptions for the old but working guides. Valuable information from the old guides should be generalised, summarised and added to the Install list below, in an manner that would keep the Initial Install page looking good.
All Asus WL-500xx series routers
- For all Asus WL-500xx series routers there are a number of ways to do the initial flash.
- The TFTP method using the two Asus specific clean-up files is the "works every time-almost" way.
- Other methods like using the Asus Recovery tool (recommended). or even using the web-GUI (not recommended) have also been reported to work for some, for the initial dd-wrt flash. So your mileage may vary.
- Pick the one that is easier and works for you - You have now been notified of the method that is guaranteed to work!
- The firmware files for the Asus WL-500xx series initial flash and the main builds are found under Downloads › others › eko › BrainSlayer-V24-preSP2 › 09-08-09-r12874 › broadcom. You will need the mini-asus.trx for the initial flashing - Read on to see when the ...asus.trx file should be used and then how to upgrade the build for your needs.
Clock Timing Bug
See this thread about a clock timing bug that affects many of these models. Check that you are affected by the bug before applying the fix.
The TFTP recommended Asus way for all WL-500xx routers
NOTE: This method should only be used when you're not a windows user or do not have Administrative privileges in Vista or Windows 7 . The better method is using the provided Asus Firmware recovery Utility that came with the router. You may also obtain it from Asus' website See below this entry for instructions.
- Links to the TFTP method of doing the initial flash of the WL-500xx series routers:
- Asus TFTP Flash. A very detailed step by step description of using the TFTP way with the extra Asus specific steps of doing the initial flash.
- From Linux using ATFTP This description may also work for OS X.
- How to Install DD-WRT onto Asus WL-500xx Using Ubuntu Linux. Includes a couple of hints to get TFTP working under Ubuntu 8.10 and 9.04.
Upgrading[]
If dd-wrt is already on the router follow these instructions. If stock firmware is on the router follow the flashing instructions.
- Check for recommended builds here first.
- Set your computer to a static IP of 192.168.1.7. (or to whatever subnet the router is on) Disable all firewalls and security. Disable wireless on your computer and only have the router connected to the flashing computer by the ethernet cable between the two.
- Hard reset or 30/30/30 (If the router supports it, if not, reset to defults in the GUI) prior to flashing. Wait. Check for password page on re-login and change password.
- Flash firmware. You can use the webgui except if you have a belkin router. (For belkin use tftp.exe to flash)
- Wait...at least three minutes. Lights should return to normal. See important2, below. Failing to wait is how most people brick their routers.
- Do a power cycle of the router. (Unplug the cord, count to 30 and plug it back in.)
- Wait for the lights to return to normal usually about 2 minutes.
- Hard reset or 30/30/30 again (If the router supports it, if not, reset to defults in the GUI). Wait. Check for the password page and re-login to change the password. Then you can reconfigure your settings manually.
- Once configured set your computer back to autoIP and autoDNS.
Important1: This Hard reset or 30/30/30 works fine for Asus router, but you do have to power cycle after the reset.
Important2: After you flash the firmware, and before you do the hard reset, the router will be building some nvram settings. YOU MUST WAIT FOR THIS TO FINISH PRIOR TO DOING ANYTHING WITH THE ROUTER INCLUDING A HARD RESET. Usually, you can tell when this process is completed by the WAN light coming on, but it does take several minutes. Go have a beer. There are starting to be more and more people who BRICK their routers by not waiting until the nvram is rebuilt, PRIOR to doing a hard reset. YOU NEED TO WAIT!
Reverting[]
 This section is in need of cleanup!
JTAG/Serial Info[]
JTAG[]
JTAG Pinouts[]
This section is in need of cleanup!
JTAG Recovery[]
This section is in need JTAG Recovery Instructions!
Serial[]
Serial Pinouts[]
This section is in need of cleanup!
Hyper terminal Setup in Windows XP[]
In Windows XP, Click Start Button - All Programs - Accessories -
   Communication - HyperTerminal
Enter a name for the connection, Click ok
Choose com port you adapter is plugged into, Click ok
Set:
 Bits per second = 115200
 Data Bits = 8
 Parity = none
 Stop bits = 1
 Flow control = none
Click ok
Click File - Save As, and select a place to save it to so you
             don't have to enter the settings again.
Putty Setup in Windows XP[]
After installing putty, run it
 Serial line = The COM port your using for serial (ie. COM3)
 Speed = 115200
Click on Serial under Connection
 Serial line to connect to = same as above (Serial line)
 Speed (baud) = 115200
 Data bits = 8
 Stop bits = 1
 Parity = None
 Flow control = None
Click Session
 Enter a name for your connection under saved sessions
Click Save
Click Open
Serial Recovery[]
This section is in need of Serial Recovery Instructions!
USB Info[]
This section is in need of cleanup!
vlan Info[]
This section is in need of cleanup!
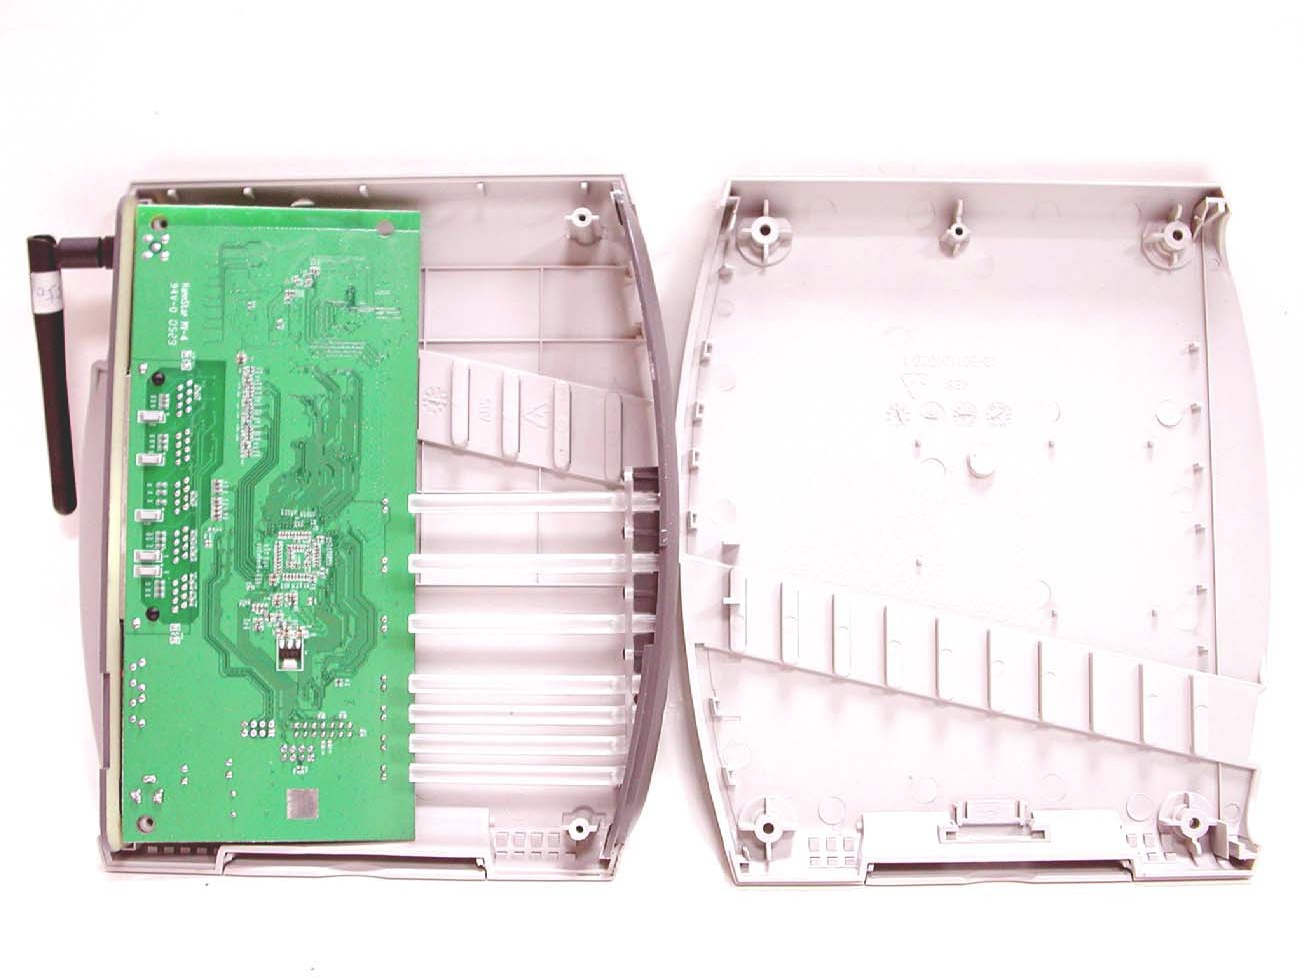
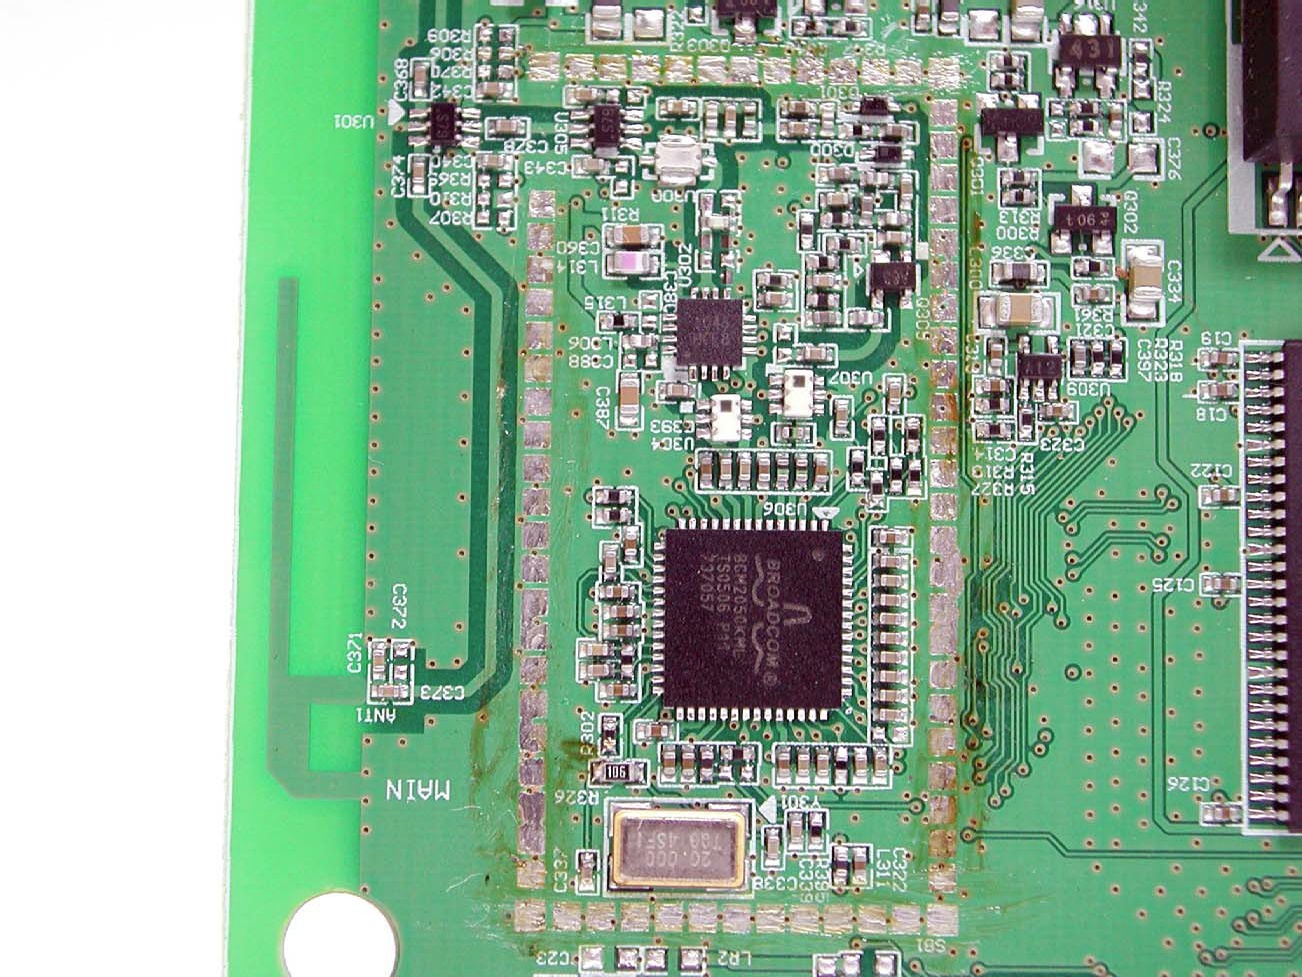
Pictures[]


FCC Pictures[]